How to Check Out your Perforce Helix Project
The p4v GUI client is available for Windows, macOS, and Linux. It provides a user-friendly interface for managing your Perforce Helix projects and is mostly the same across platforms.
Step 1: Install the Perforce Client
- Install the Client:
Go to https://www.perforce.com/downloads, download and install the P4 Visual Client (P4V).
- Configure the Client
p4v client. This is the icon.
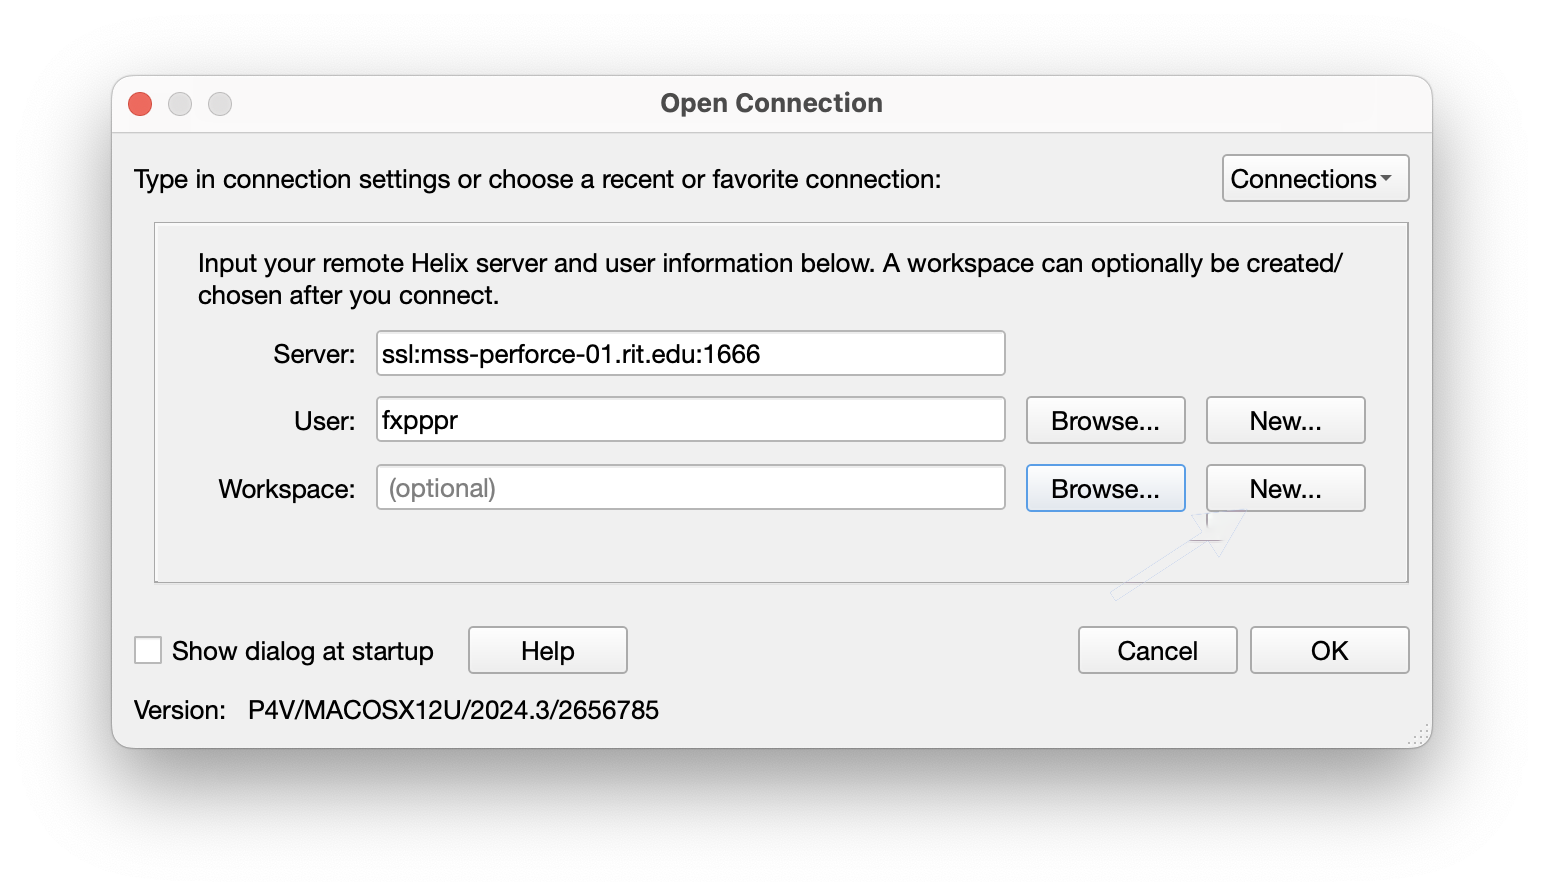
0, no spaces.) Next your user. It is your RIT user without any @rit.... Leave the workspace blank for now. We just want to get logged in.
p4 is running on a secure connection (SSL) by default. When you first start p4v it will ask you to confirm some certificates. Go ahead and accept them. (TODO: put the screenshots and hashes here.)
The GUI client plays ‘ok’ with the command line interface (CLI) client. The settings are mostly shared but not always, so be prepared for weirdness if you use both.
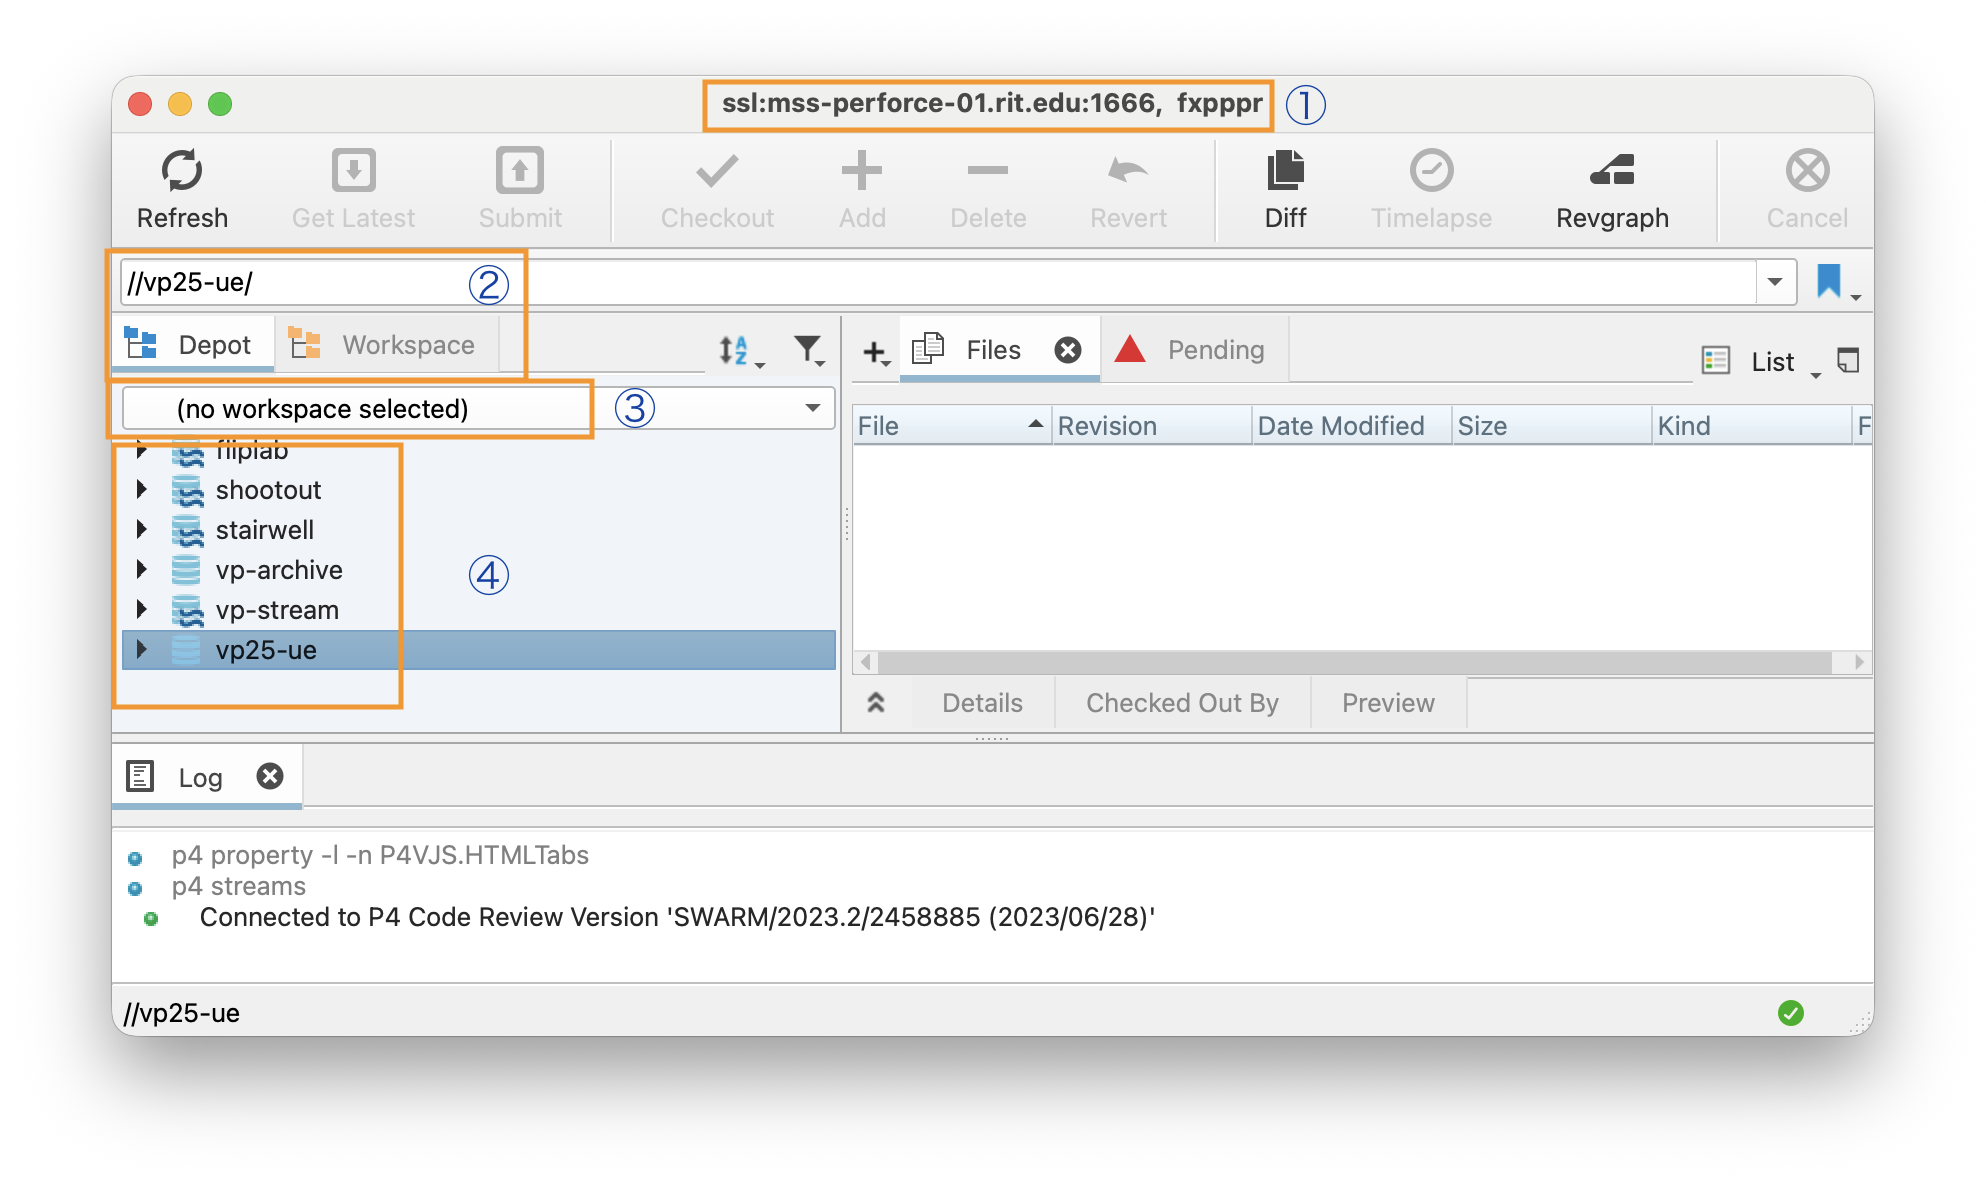
Congratulations! You’re in.
Step 2: Create a Workspace
- The Main Window:
- Create the Workspace:
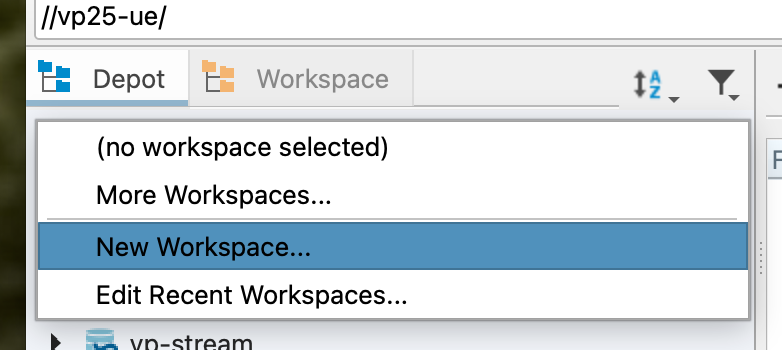
Workspace mode, click the popdown menu and select New Workspace....
There are 5 things we need to configure in this dialog:
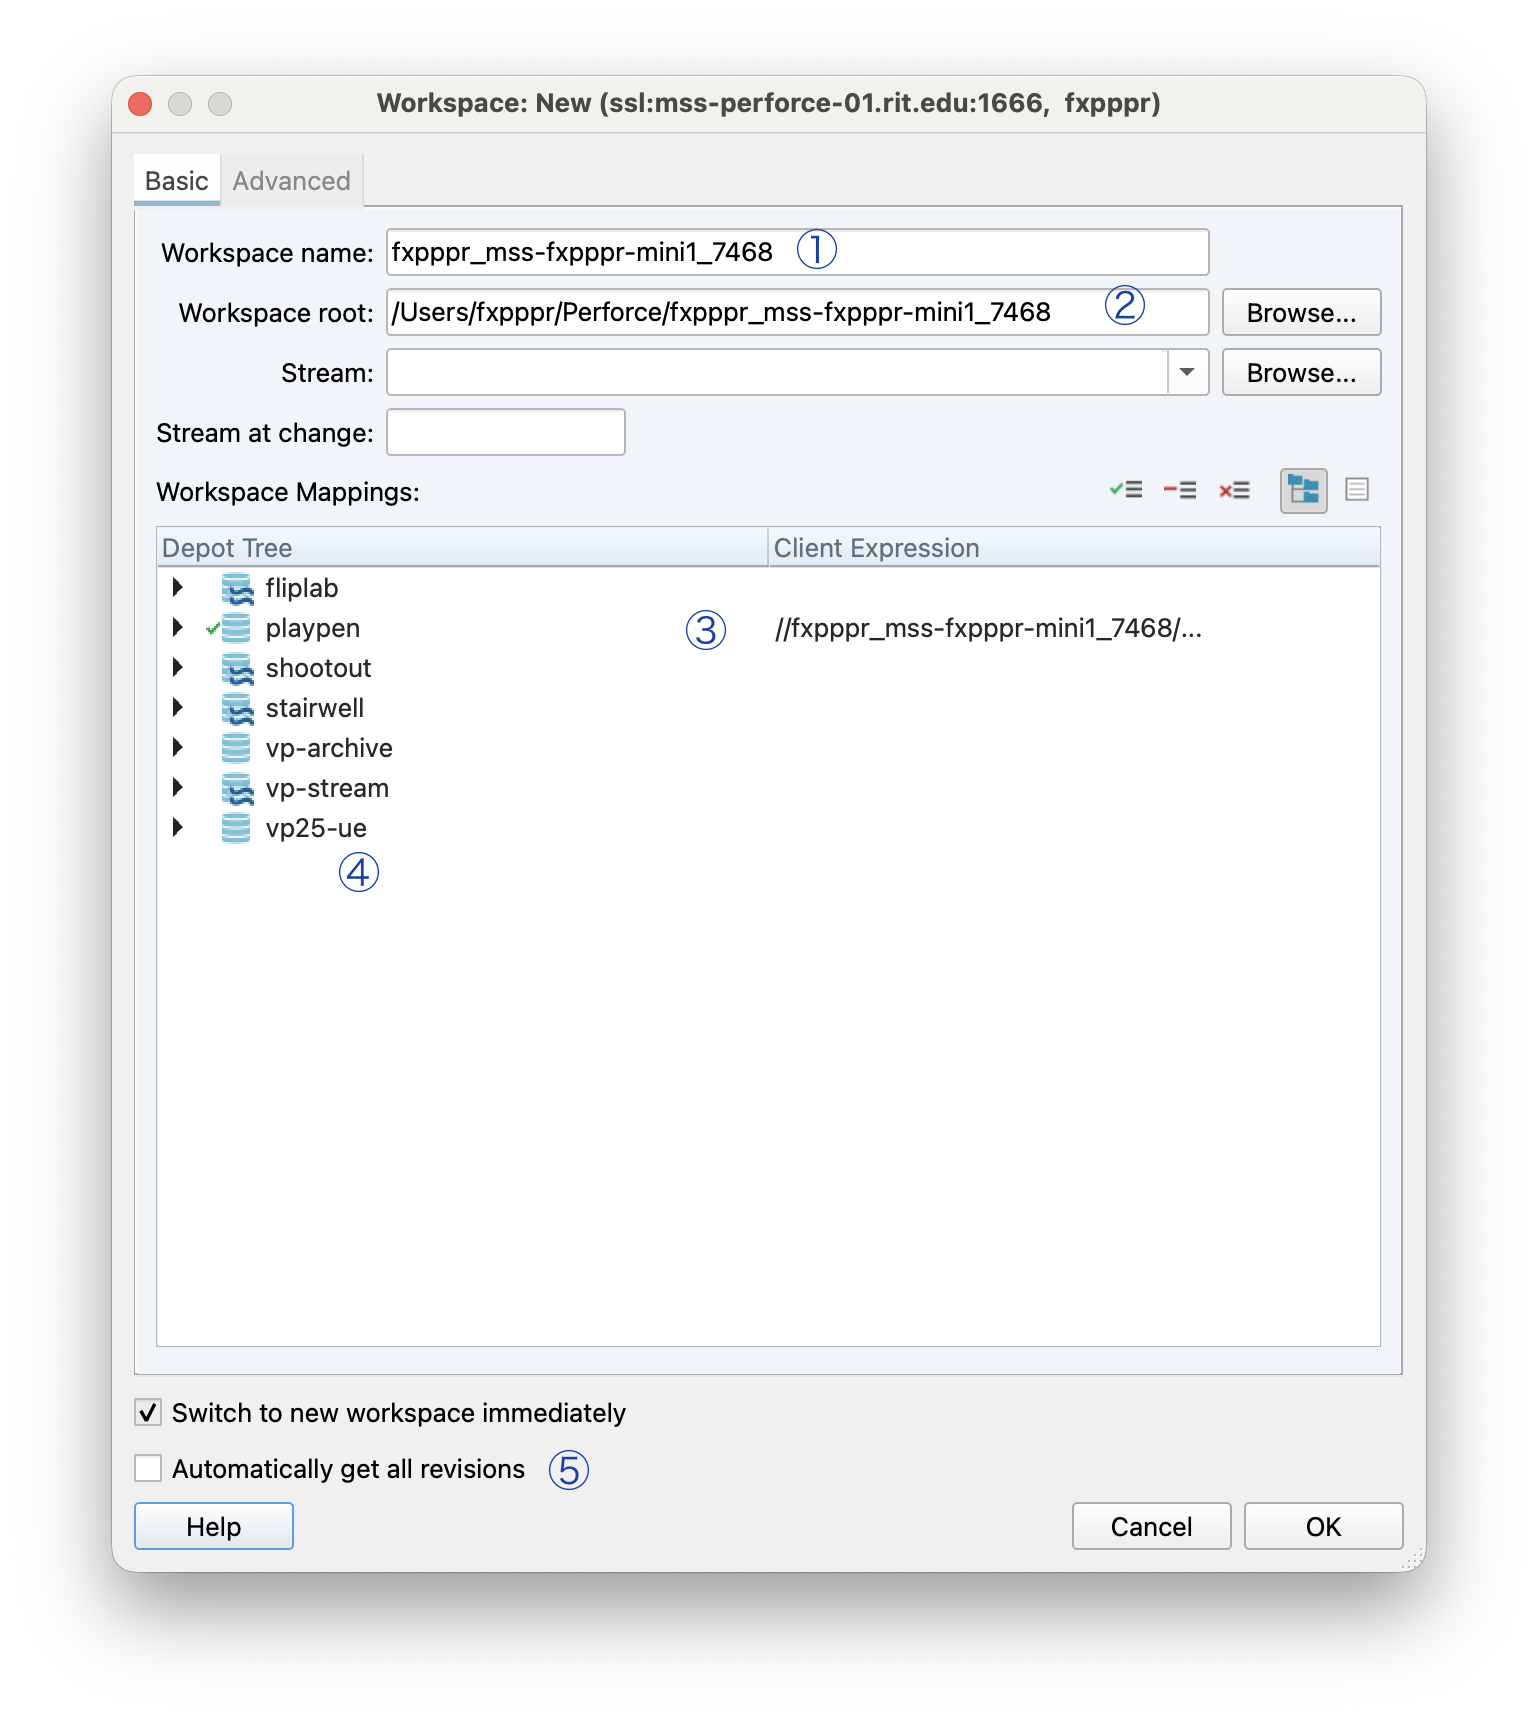
Change:
A name for your workspace. I use something simple like
laptop_vpbecause I don’t work on very many machines. You can see that the default has the username, machine name, and a unique identifier. You can be simpler.Workspace root gets set automatically. Unless you have another reason (like, say putting it on a remote drive) you can leave it the way it is.
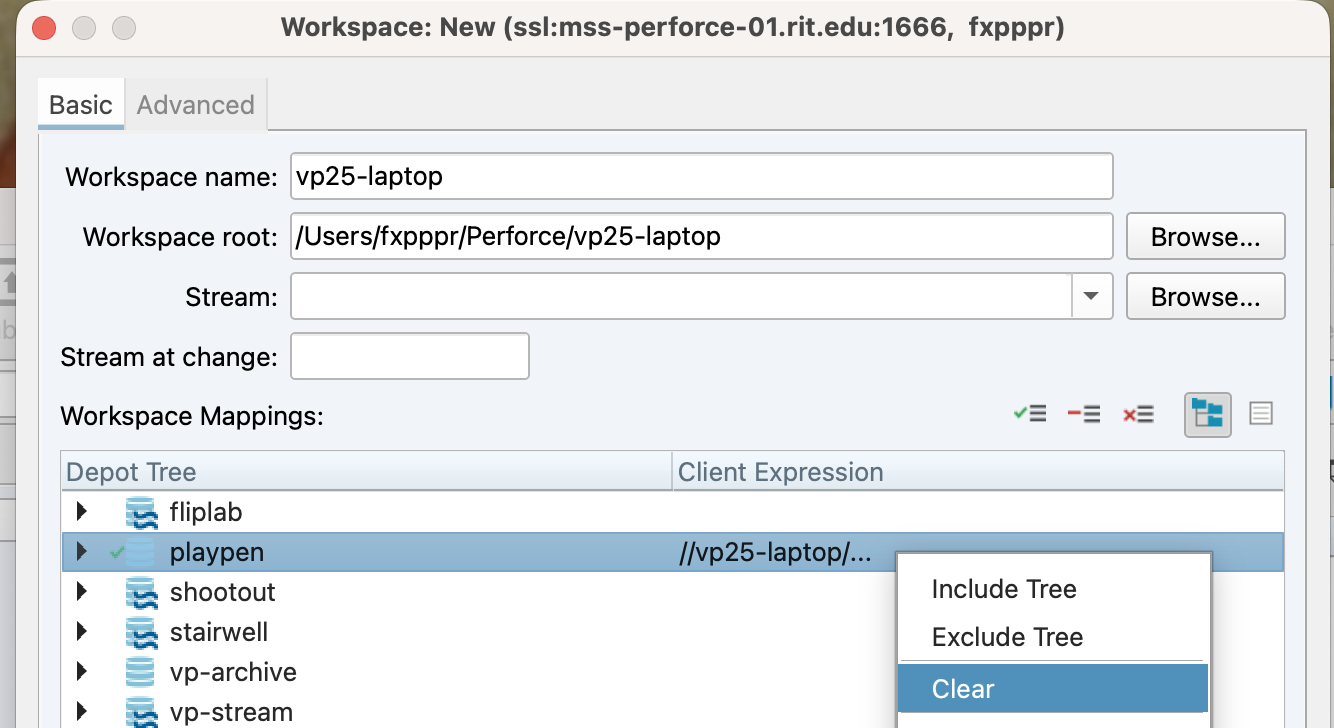
You need to right-click and
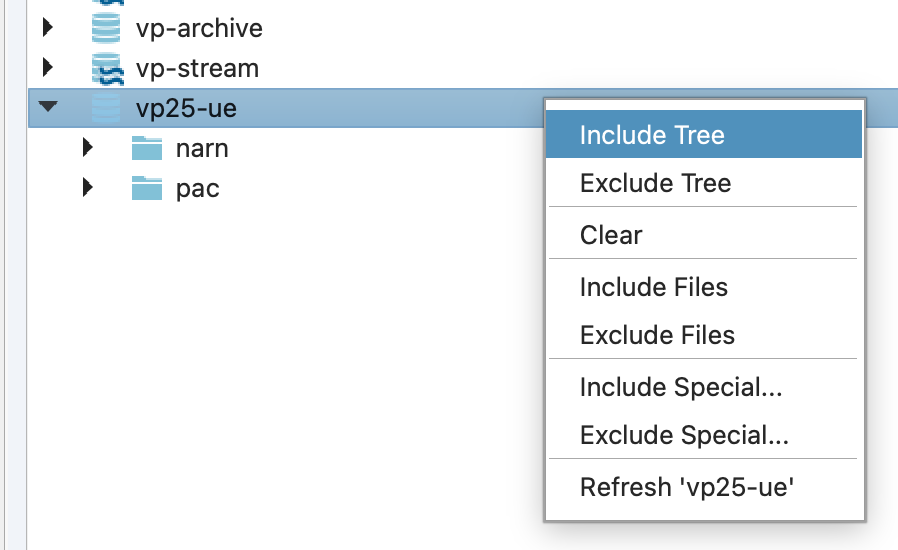
Clearthe default mapping fromplaypen.You can right click on the
vp25-uedepot and selectInclude Treeand you get everything under that depot. If that’s too much, you can justIncludespecific folders for your project.If you click this, it will download everything so you don’t need to do an initial sync. Your choice. Sometimes it throws an error that it couldn’t create the workspace if this is checked.
If you have Automatically get all revisions checked, when you click OK it will download the project.
Otherwise, you can click on the Refresh and Get Latest buttons in the top of the Workspace window to download the project.
As the sync is in process you’ll see a dialog box. Also, the log tab will show you what is happening.

WIP
UE
Unreal Engine has built-in support for Perforce. This means that you can use Perforce from within Unreal to manage your project. This is a powerful feature, as it allows you to manage your project without leaving the Unreal environment.
Alas, sometimes you still need to use p4 or p4v to perform certain tasks. Most of the time you can live in Unreal.
You can read about and explore the Perforce integration in UE here.
The Unreal documentation is here. It focuses on setting up a local server, etc. Lots of detail in here, mostly requires CLI tools, so maybe just treat it as reference.
Basic Workflows
Once you’ve synced your files, you’re ready to start working. Remember, the workspace files are stored in a directory on your machine, here, for me, a subdirectory of /Users/fxpppr/Perforce.1
Now you’re ready to use Unreal to work on your project.
Managing and editing files
First, you need to launch your project in Unreal. You can just double-click the .uproject file in your workspace directory. This will open Unreal and load your project.
When you are the first person to download some of our template files, you are presented with a dialog box asking if you want to update the UE project to the latest version. If you do say yes, it will update the project files but it will also check out the files so the changes can be made.
You have to be sure and check the file back in, lest you leave it dangling ‘open’ and checked out.
Notice that this should only happen the first time, it only modifies the .uproject file. When someone checks it back in, it has now been updated for everyone. But, of course, each member of the team needs to download it.
Alternately, you can use the p4v client to open your project. This is useful if you want to see what files you have checked out, or if you want to check out files from within the Perforce client.
Setting up Perforce Integration
When you first launch the project you’ll need to set up Perforce integration.
Setting up UE
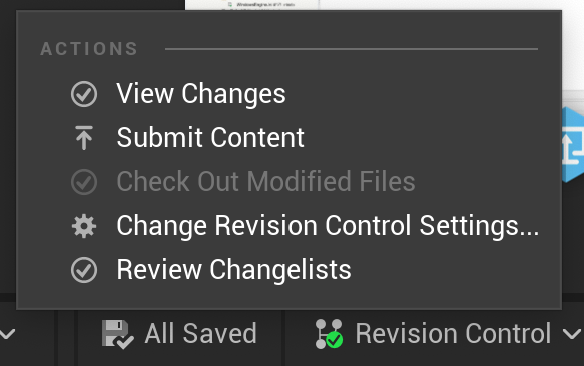
After you launch your project, you can set up Perforce integration. This is done in the Source Control menu in Unreal, found at the lower-right of the main window.2
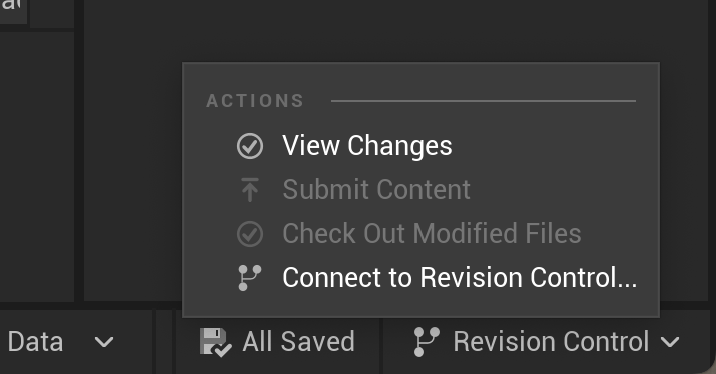
Source Control menu in Unreal. You can set up Perforce integration here as well as manage checking things in and out.
Select Connect to Source Control and then select Perforce.
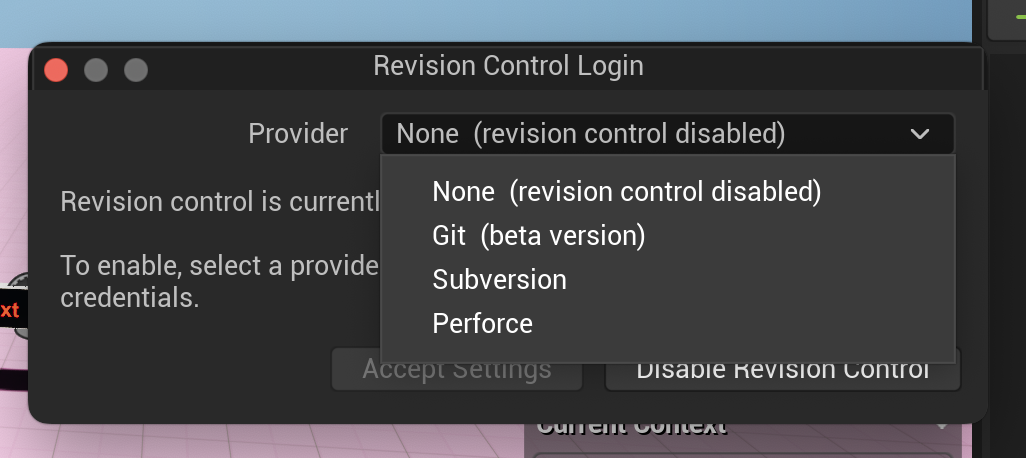
Perforce from the list of source control systems.
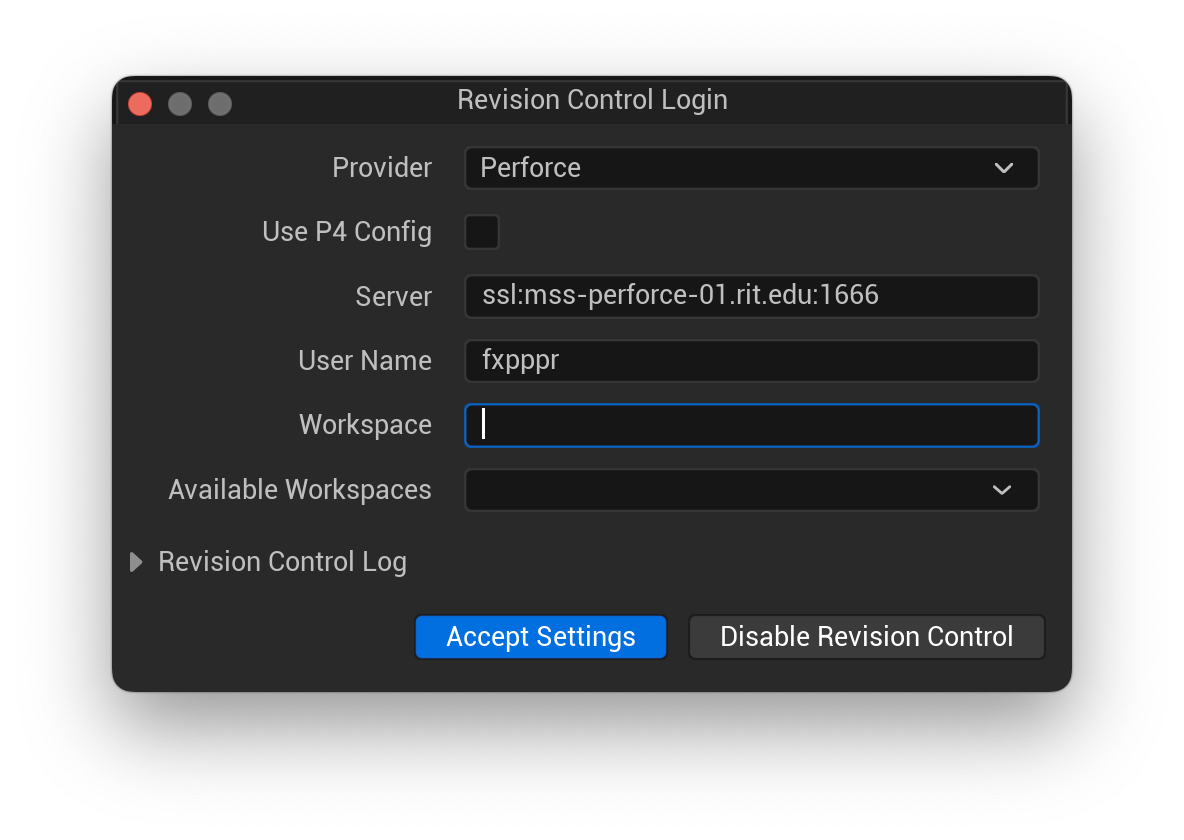
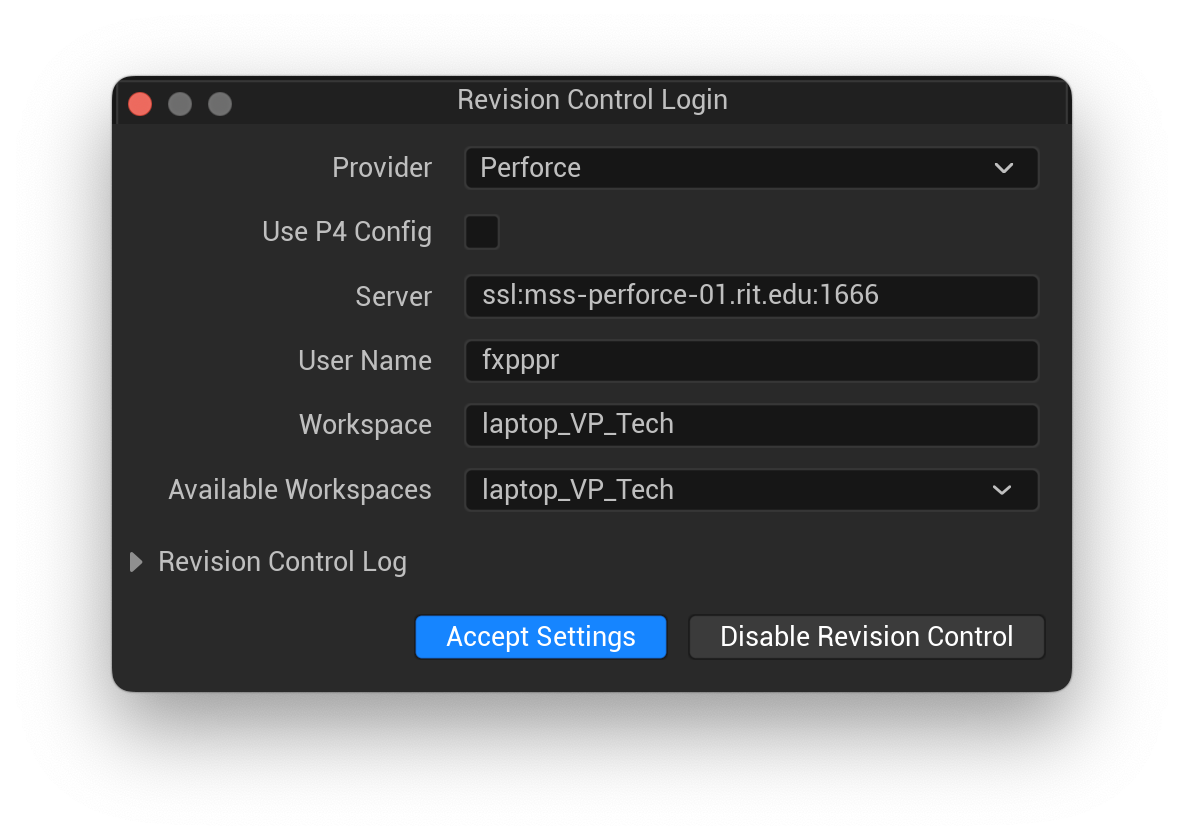
You’ll be asked for your Perforce credentials here and to select a workspace to associate with the project. You should select the workspace you set up earlier. You might have to log in to get the popup list of available workspaces to appear.
You can use the Source Control menu to check out files, submit changes, and see what files are checked out.
Working with Perforce in Unreal
Levels, Levels, Levels. You should partition the project into as many levels and sublevels at practical. If you have someone working on a specific area, they should create a new level or sublevel for their work. This will help to keep changes isolated and make it easier to manage the project.
Did I mention levels?
More to come…
- Levels
- Check out vs. Locks
- The P4 Bot at https://rit.enterprise.slack.com/archives/C09JUVA0A1H
- So much more …
Footnotes
On the servers and stage machines, we store the files on drive
D:in a directory calledp4.↩︎Note that, depending on how you launch Unreal, you may see a dialog box saying that this file is ‘locked’ and, do you want to unlock it. You should say ‘yes’, and realize that it is different than ‘checking it out’ in Perforce. This is a local lock, not a Perforce lock.↩︎