flowchart LR
  AAA[[YML Header]]
  AA[[Markdown]]
  CC[[LaTeX]]
  DD[[Mermaid]]
  EE[[Python]]
  FF[[bibliography]]
  A(qmd file)
  B[quarto render]
  C[pandoc]
  D(html output)
  E(PDF output)
  F(Word output)
  G(... output)
  X[Chromium]
  Y[TinyTeX]

    AAA --> AA
    AA --> A
    CC --> A
    DD --> A
    EE --> A
    FF --> A

    A --> B
    B --> C
    C --> X
    X --> D
    X --> E
    C --> Y
    Y --> E
    C --> F
    C --> G
[WIP] Work In Progress
How To Do This
This is a quick (and incomplete) guide to setting up a system to work with this sort of document. It’s a WIP, updated as I get the chance.
Visual Studio Code
Everything hangs on this. Download and install Visual Studio Code. You can download the ‘Insiders’ version if you want to live on the edge.
We’ll install a few extensions later to make things easier, but you can do that from within Visual Studio Code itself.
Quarto
Quarto is the main text processing system. It started out as part of RStudio1 so if you have RStudio installed, you might already have Quarto.
If not, you need to install it. Go to the Quarto website and follow the instructions.
Then, there is a tutorial at here that you could follow if you want to get started.2
You can interact with Quarto from the command line via the quarto command. You can also use it from within Visual Studio Code, which is what I do mostly. quarto help will dump out a list of commands you can use. quarto check will give you a status report of the installed components.
Essentially, you compose your document with a form of Markdown that supports lots of author-friendly extensions. You can include images, LaTeX, Mermaid diagrams, and Python code. You can also include references and citations. There is a direct link to Zotero, which is a reference manager that I like and use a lot.
Pandoc
Quarto on the Macintosh and Linux have support for pandoc built in, but on Windows you might need to install pandoc separately. You can get it from here.
TinyTeX
Similarly, you might need to install TinyTeX on Windows. You can do this with the quarto command:
quarto install tinytexI believe that, if you have another TeX distribution installed, Quarto will use that instead of TinyTeX. I have TeX Live installed, and Quarto uses that.
Chromium
Quarto uses Chromium to render the HTML output. You need to have Chromium installed. It will use Google Chrome if you have it installed. If not, you can install it using the quarto command:
quarto install chromiumExtensions
There are a few extensions that you might want to install in Visual Studio Code to make things easier.
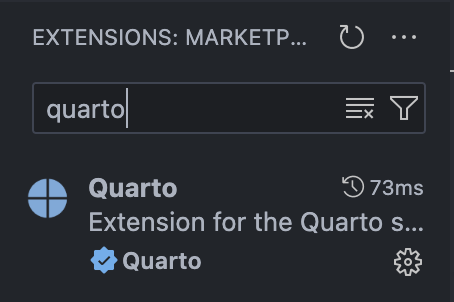
Quarto
The Quarto extension is the main one. It provides syntax highlighting and some other features. You can install it from the Extensions tab in Visual Studio Code.
Go to the Extensions tab and search for Quarto. You should see the Quarto extension. Click on the Install button.
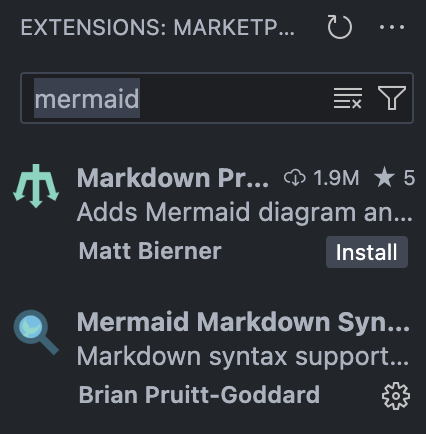
Mermaid Syntax Highlighting
The Mermaid extension provides syntax highlighting for Mermaid diagrams. You can install it from the Extensions tab in Visual Studio Code too.
Others
I have a few other extensions installed to help with Markdown formatting, LaTeX, etc. You might find others that are useful, but the Quarto extension is the only one that’s prety much essential.
Setting Up a Project
Git and GitHub
You need a GitHub account. Go to GitHub and sign up. To publish to our class repo you need to be part of the ritmps organization, so let me know your username and I’ll add you.
The repository containing the FIP 2024 class materials is here. Note that it is private, so you need to be added to the organization to see it. The pages it generates are public, so you can see them here.
GitHub Pages
The class materials are hosted on GitHub Pages. The pages here outline how to set up a GitHub Pages site. I’ve already done this for the class, so you don’t need to do anything.
The process works like this:
sequenceDiagram
    GitHub-)Laptop: Clone
    %% loop Edit Process
        GitHub->>Laptop: Pull
        Laptop->>Laptop: Edit
        Laptop->>Laptop: Preview
        Laptop->>GitHub: Push
    %% end
    GitHub-->>GitHub Pages: Build
github to github pages process. This assumes you have the repository set up to build the pages for you rather than you building them yourself.
The figure above (Figure 4) shows the process. You clone the repository to your laptop, edit the files, and push the changes back to GitHub. GitHub Pages then builds the site into a directory that is served up on the web.
Repository Setup
There are a few special things you might need to do to set up your repository to work with GitHub Pages.
.gitignorefile: You need to have a.gitignorefile in your repository that tellsgitto ignore the files thatQuartogenerates. During preview and local (aka laptop) render,Quartogenerates a lot of files that you don’t need to track in your repository. By default, Quarto puts them in a directory called_site. It also creates a directory called.quartothat you don’t need to track. My.gitignorefile looks like this:
/.quarto/
/_site/.github/workflowsdirectory: You need to have a directory called.githubin your repository. Inside that directory, you need a directory calledworkflows. Inside that directory, you need a file calleddeploy.yml. This file tells GitHub how to build your pages. Mydeploy.ymlfile looks like this:
name: Quarto Publish (GitHub Pages)

on:
  push:
    branches: [main]
  workflow_dispatch:

permissions:
  contents: read
  pages: write
  id-token: write

concurrency:
  group: "pages"
  cancel-in-progress: true

jobs:
  build:
    runs-on: ubuntu-latest
    steps:
      - name: Checkout
        uses: actions/checkout@v4

      - name: Show repo layout
        run: |
          pwd
          ls -la

      - name: Setup Quarto
        uses: quarto-dev/quarto-actions/setup@v2
        with:
          version: 1.9.38

      - name: Quarto version & check
        run: |
          quarto --version
          quarto check install

      - name: Render site
        run: |
          set -euxo pipefail
          quarto render --output-dir _site --log-level=debug

      - name: Upload artifact for GitHub Pages
        uses: actions/upload-pages-artifact@v3
        with:
          path: _site

  deploy:
    needs: build
    runs-on: ubuntu-latest
    environment:
      name: github-pages
      url: ${{ steps.deployment.outputs.page_url }}
    steps:
      - name: Deploy to GitHub Pages
        id: deployment
        uses: actions/deploy-pages@v4
You can set up your repository to use GitHub Pages by going to the Settings tab in your repository and scrolling down to the GitHub Pages section. You can choose the branch to use for the pages and the directory to serve from. The default is the main branch and the docs directory. You can also choose a theme for the site.
This only works if you don’t want GitHub to build it for you. The ‘best’ way to do it is to have GitHub build the pages for you. You can do this by setting up a GitHub Action to build the pages. This is what I do for the class materials. The deploy.yml file above is the one I use. There are detailed instructions here.